This captivating film has recently earned 2023 Sports Emmy nominations in Outstanding Cinematography and Outstanding Post-Produced Sound.
You’ve seen Driven with Sylvester Stallone, right? It’s kind of like that — only we had permits.
Much like the sport of Formula 1 itself, this production served up engineering and performance challenges at nearly every turn. Here are some of those technical challenges, how we engineered the solutions, and how the creative concept drove much of the gear and technology we used. Hopefully, sharing this experience will inspire you to get out and shoot.
At the Starting Line of This Red Bull F1 Road Trip
“Race to Miami” is the third in a Red Bull F1 Road Trip USA series that began in 2017. The premise: Take the classic American pastime of the road trip and combine it with the most absurd way to take one — in the highest performing motorsport racing vehicle, a Formula 1 car.
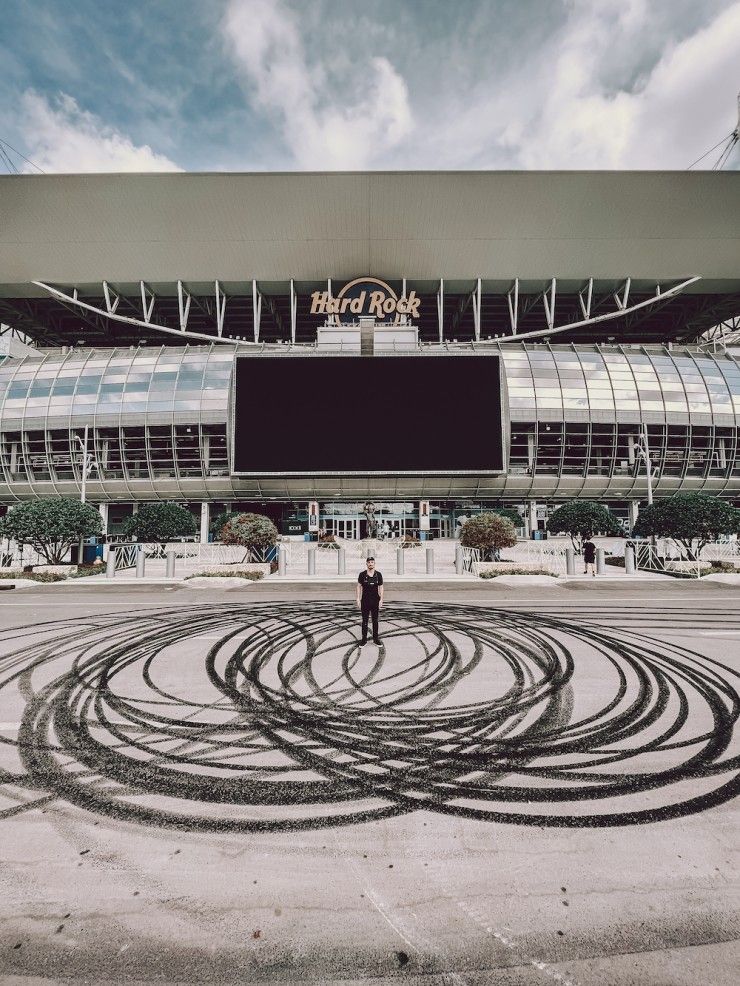
The story: An honest misunderstanding between F1 driver Sergio Perez and F1 team boss Christian Horner sends the car racing across Manhattan, Florida’s Everglades, and downtown Miami before ending up at the Hard Rock Stadium to take the first lap of F1’s newest race venue.
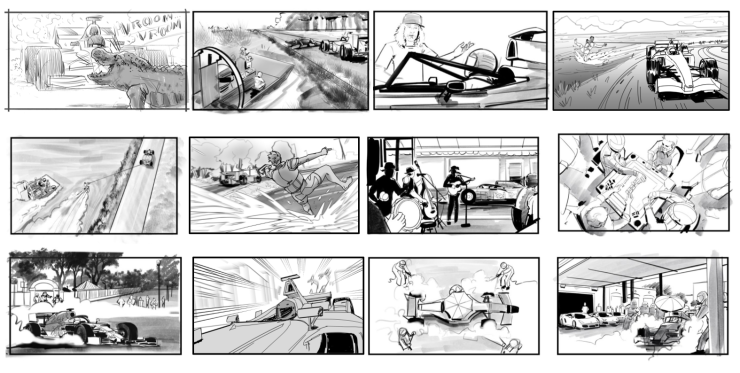
Early storyboards for the Miami sceneCredit: Red Bull Content Pool
We knew we wanted to juxtapose high-action sequences with more approachable and awkward situations you’d find on the road while featuring our F1 car as the constant throughout. Our team worked traditionally with storyboards during pre-production and referenced classic American films. At this point, much of our thinking was around dreaming up the most absurd comparisons possible between a clinical race track environment and the city streets of our two primary locations.
Sorting out some of the more specific shots, including the opening Manhattan helicopter scene, the Everglades alligator scene, and the miscommunication’s payoff at the end, required having detailed storyboards and ideas ahead of time.
Like most productions, variables changed daily. Having a solid basis of story and concepts ahead of time allowed us to react. In particular, running a solid visual paper edit allowed us the flexibility to efficiently use our resources on things that would make the final cut.
To make things even more challenging, shooting time with the F1 car was extremely limited. It’s like working with a child actor, unpredictable and on a short timeline. How do you maximize what you’re able to get in the field? It’s here that our problem-solving began.
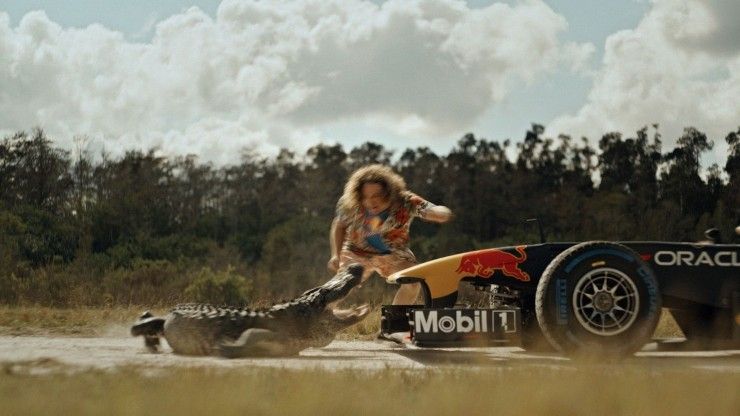
Film grab from the RED Monstro as Parks Bonifay avoids the gator, all captured practicallyCredit: @willroegge
Location Problems and Finding Efficiencies
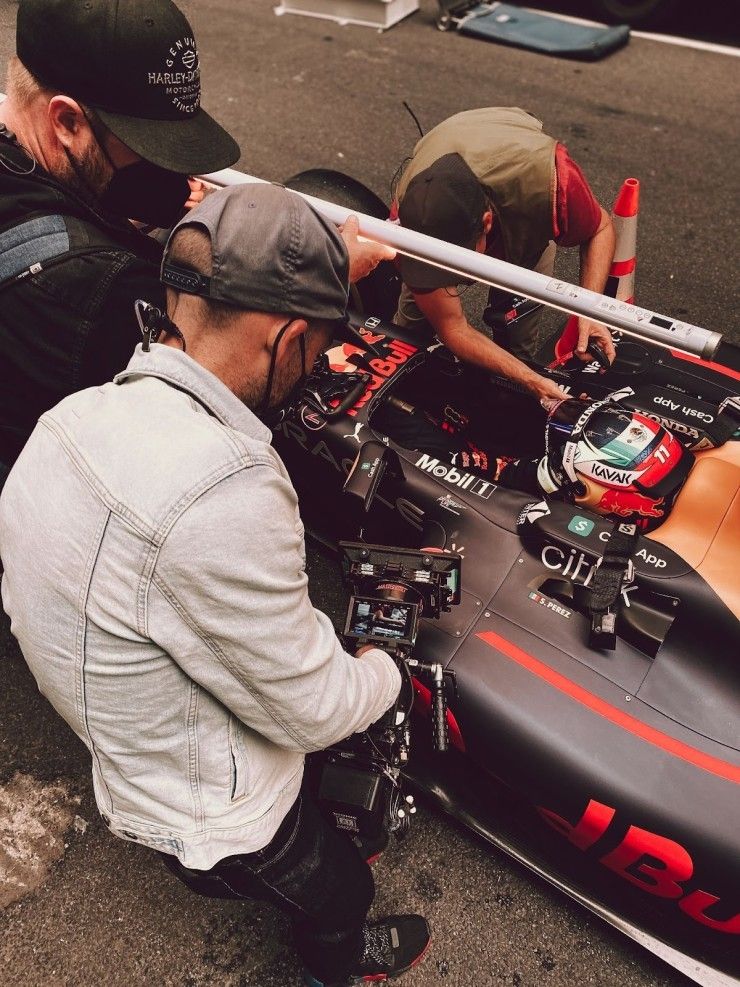
The most important thing was to showcase the true performance of these cars by shooting practically — no camera or post tricks. We engineered everything around capturing the speed of an F1 car. However, shooting with one of these cars isn’t straightforward. They are incredibly complex machines with many specific requirements and procedures.
We were shooting with the Red Bull Racing RB7, the world constructor and driver’s championship-winning car from 2011. It weighs just 640 kg (1400 lbs) but packs a V8 engine producing 750HP at a max RPM of 18,000. This thing sounds like a demon stepping on a Lego, mixed with the highest-pitched scream you’ve ever heard. It’s a thing of engineering wonder and completely captures the feel of motorsport, but there were production challenges to pay for that performance.
First AD Jeremy Robinson, and 2nd AD Daniel Williams with the race team waiting for traffic to hold on the FDR highway in New York CityCredit: @brandonkado
First, every time the car shut off, it takes a team of eight people and a computer to restart it. Second, there is the heat generated by that ferocious V8 engine. F1 teams design their cars to go fast, not wait around for cameras to move into position or for traffic to move out of the way. If you want to put it in neutral and hold for a shot, you might have just seconds before the car overheats.
Then, there’s the speed. For an F1 car, 60 mph is slow. It’s not exactly easy to control on the tight and bumpier-than-a-racetrack streets of New York City. Finally, that sound that I mentioned before — the demon’s scream? It’s enough to get noise complaints from a mile away and stun anyone nearby.
Because it was such an incredible and attention-grabbing scene, we needed every sidewalk and area safe and clear. If the car had to shut down for a take, the whole AD/PA team would be physically pushing it back to its starting area.
On this shoot, a typical day would see four company moves to separate locations, with a 0.5 to 1-mile shooting route. Each take would have between 15-40 PAs and a whole team of assistant directors (lead by our 1st AD Jeremy Robinson or Franco Parente). Such fast-moving complexity calls for an incredible level of collaboration on the day, but it also pushes everyone to sort out as much as possible in pre-production.
Aftermath of one take, Hard Rock Stadium, Miami. Credit: @austingager
Building the Team
A certain amount of flexibility and familiarity is needed to work within the tight boundaries of a production like this. We brought on Will Roegge as our DP to draw from his motorsports experience and ability to work quickly. Will and I agreed on specific tech and creative decisions/references in pre-production and then separated duties on-site so he’d manage the camera department, and I’d work directing the AD team and driver.
Time constraints meant that we didn’t have the usual wireless monitoring from all cameras, so a combination of trust and quick feedback allowed us to make sure we had the shots needed. I usually wouldn’t see any footage until around midnight every night because it was too fast-paced to slow down.
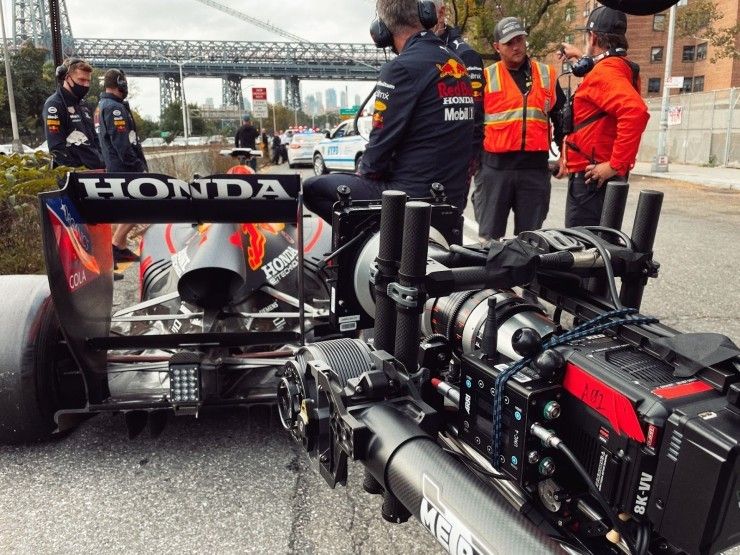
Director of Photography Will Roegge with the handheld RED Monstro and 24mm Masterbuilt Soft Flare prime lensCredit: @austingager
When collaborating with a DP, I look for someone who is technical and has a good eye for editing. A lot of what Will did was make sure that we’d have coverage to get into and out of scenes with our camera placement. I found it helpful to talk through the editing style and specific aesthetic (including grading and picture finishing), so he could enlist his team to make sure exposure/composition and overall coverage were solid.
With our ground angles covered, the additional camera platforms offered up what I call the “candy on top,” which are the FPV drone and camera car shots. Confidence in our strong ground coverage allowed the drone and camera car operators to take more risks, knowing that a scene wouldn’t be lost if they broke frame, missed focus, or if their timing was off. It was a privileged place to work from, but it took a lot of pre-production planning to achieve.
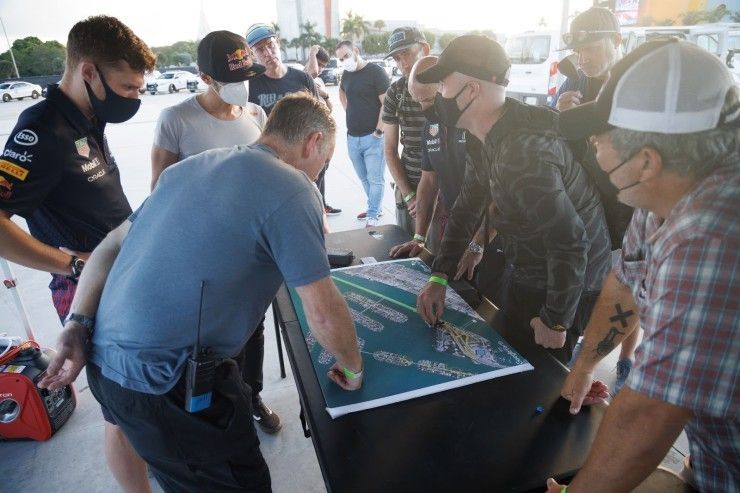
Safety meeting with the crew, second day of shooting at the Hard Rock StadiumCredit: @austingager
Measure Twice, Cut Once
If there’s one takeaway that summarizes this shooting style, it’s that planning is everything. There’s a kit that we always bring to a shoot like this:
Large area boards printed from Google Earth Pro with sun direction plotted
Toy models of the different elements
A reMarkable tablet, iPad Pro, or simply laminated maps with dry-erase markers for quick alignments in-between takes
We would do a traditional location scout that was followed weeks later by a tech scout, and then we’d usually roll right into actual shooting on the following day. The three items in that kit allow everybody to collaborate and put their expertise forward. I’m a believer that the best productions are collaborations, and facilitating that was my most important role as a director.
For example, in the opening driving scene where the car was lit from above by the helicopter, our helicopter pilot could easily coordinate the light sourcing with the camera car to ensure that the light was a backlight for the ground angle.
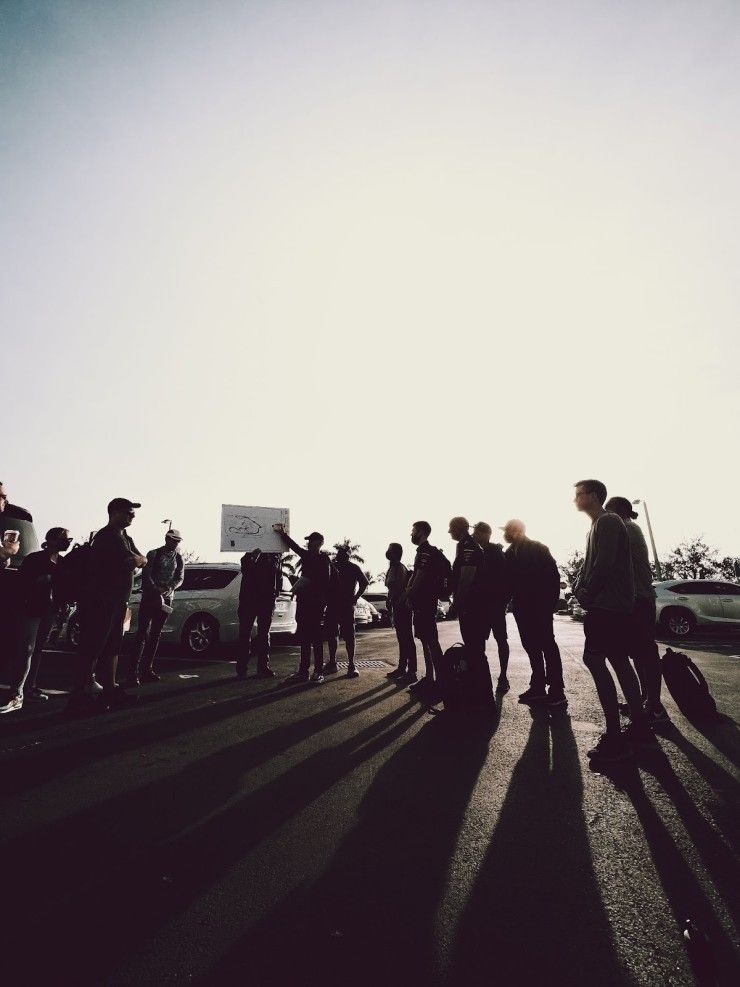
Another instance was working with the (outstanding) NYPD officers, which provided flexibility and ideas on where the car could turn around and loop back to the start of a shot without opening up our closure. Depending on the location, these planning meetings would have between 6-20 people and would take between 5-10 minutes. Our camera team would always do a specific meeting the night before, while the larger team of police officers and safety teams (fire/rescue/police) would meet the moments right before the first take.
As a filmmaker, you’re always looking to push the creative and the look, but you can’t underestimate the complexity and potential danger of these shoots. Everything has to be 100% safe, or nothing moves. Without the above planning tools, you’re limited to shouting over the engine noise, which only serves to raise tensions. Not ideal.
We used this planning method for everything from visualizing sun direction between NYC buildings to light sourcing into the Hard Rock Stadium for the final shot and everything in-between.
Even with those levels of planning, there are always time and resource limitations. We averaged two to three “runs” of the car in each location, which is not ideal for risk-taking with shots. We had to find some unique tech solutions to give the film a look and feel, while still making sure we were covering our story.
Our DP Will Roegge and I had worked together on the previous F1 Road Trip USA series and had several discussions about what we wanted to achieve with this one. The goal was to really capture the speed and maneuverability of the car, without resorting to the usual shots of a race broadcast.
How do you take that more considered cinematography of a film like Rush or Ford v. Ferrariand capture the speed and agility of these cars authentically, while making it feel like you’re there? There were a few technical solutions that helped us along the way.
This was our camera plan:
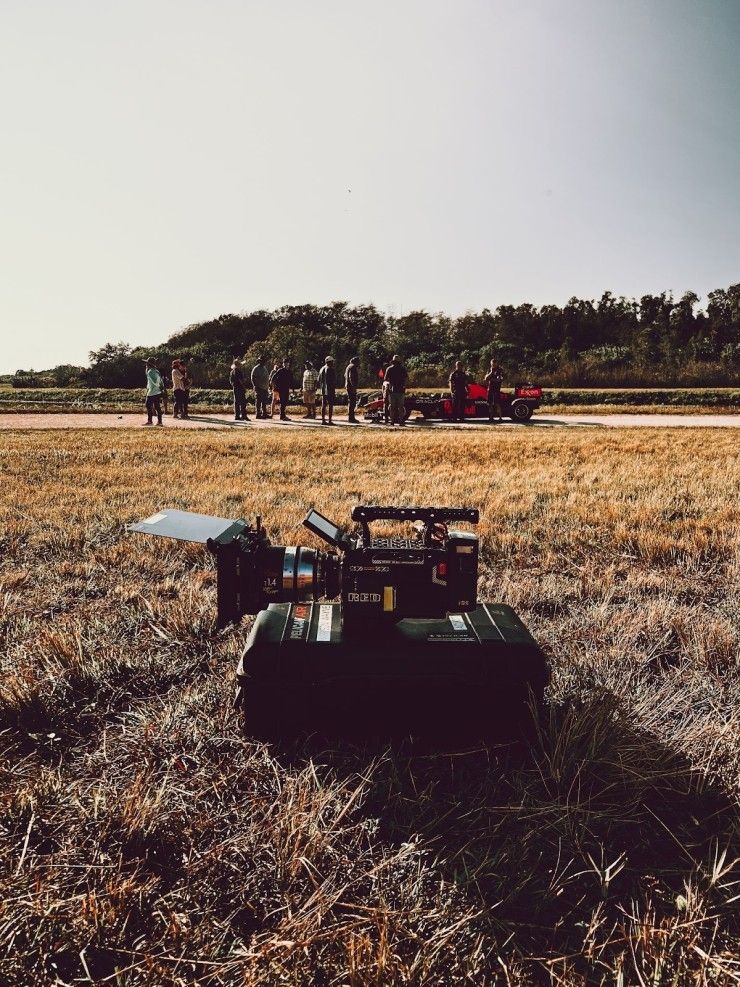
RED Monstro setup with 14mm Masterbuilt Soft Flare prime lens for handheldCredit: @austingager
The camera team consisted of three ground-angle operators. They moved between handheld RED Monstros fitted with wide primes, a Canon 50-1000mm (usually on a high-hat and an OConnor 2572 head) to cover inserts and scene entrance/exit, and a lightweight kit that was fluid enough to move around a scene capturing context. Our DP would operate our camera car platform or occasionally step into gimbal opp on the Inspire drone.
For audio, we had to use specific high-SPL dynamic microphones that could handle the incredible noise of the car. Some of these were coupled with remote record packs to ride on-board the car, while boom operators at camera positions captured the unique reverb of the V8’s sound in the city, country, or whatever unique place we were in.
The fastest way to move at the pace of this car was to outfit it with onboard cameras. Our POV camera expert Collin Harrington had worked with us before, and we exclusively used GoPros for smaller cameras with the occasional RED Komodo.
We did a lot of work that I’ll let Collin explain:
“My standard base settings for GoPros are—bit rate high, shutter auto, ev comp -0.5 (adjust accordingly for interior car shooting), white balance 5500 for daytime, iso min/max 100 (adjust higher for darker conditions), sharpness low, color flat.
And my biggest thing: HyperSmooth is always off! When trying to get the fast feel of a powerful vehicle, you want the added shake and feel of the speed. Only rarely will I put HyperSmooth on, for only very particular shots.
I use NDs as much as possible, depending on the light. Lighting is always changing, so I ND enough to get near a 180 shutter and just let the auto shutter keep it close. That way, we get the blurred surrounding for the added feel of speed.”
In some situations, we would use specially modified GoPros to get a more pronounced DOF and find focus on the driver and the driving inputs. My favorite shots were the actual driver POV shots where we’d get a camera right on eye level for their perspective. It was pretty wild seeing just how intense the driver’s inputs are. We love giving the audience that direct POV of what it’s like to drive these cars.
Drones at F1 Speed
Our FPV drone pilot was Johnny Schaer, also known as JohnnyFPV. While still in California before the shoot, we did virtual scouting of all locations via Google Earth Pro and came up with a few conclusions. We would use a combo of converging shots and working the corners, where the FPV drone, whose max speed is about 110 mph, would have a chance to catch up with the even faster car.
We did run into one issue generally on the shoot. To show the car’s speed and make it look its best, we wanted to be as low as possible. The problem is the average height of an F1 car off the ground is about 2.9 inches (75 mm). FPV was our best bet to get that shot. Johnny would pick a path towards the car, start his orbit on the car’s deceleration, and then speed up to chase away. He’d fly just a few inches off the ground, which was really intense to watch live.
He used a 5100 6-cell battery, which could take a lot of abuse on the throttle, and 8-inch prop setups on his custom-designed carbon drone frame.
Coordination with the driver was a key part of making the FPV shots really work since solely reacting to his driving would have made for less-than-desirable results. In what was one of the more intense moments on the film, we had the F1 car on a public road straightaway pushing 180+ mph. We were going to showcase this by having the drone converge at car level doing its max speed of about 120 mph, for a relative convergence speed of 300 mph. We did extensive planning so that the driver would know exactly where and what the drone was doing, as, in his words, “It looked like a speeding meteor of metal” coming at him.
Ultimately, we used different lanes of traffic and a short pop of elevation to make sure everything was safe along with an extra spotter for both the driver and drone pilot.
Johnny flies a RED Komodo, and we used custom modified 14mm Laowa and 18mm Zeiss lenses to take the sharpness down and let the global shutter on that camera flare and blur with motion. That heightened feel was a combination of flying, lensing, and camera. We also used the Freefly Wave camera for a few shots with the barefoot skiing, shooting 4K at 420 fps right into the water.
You can check out the reel of his shots here:
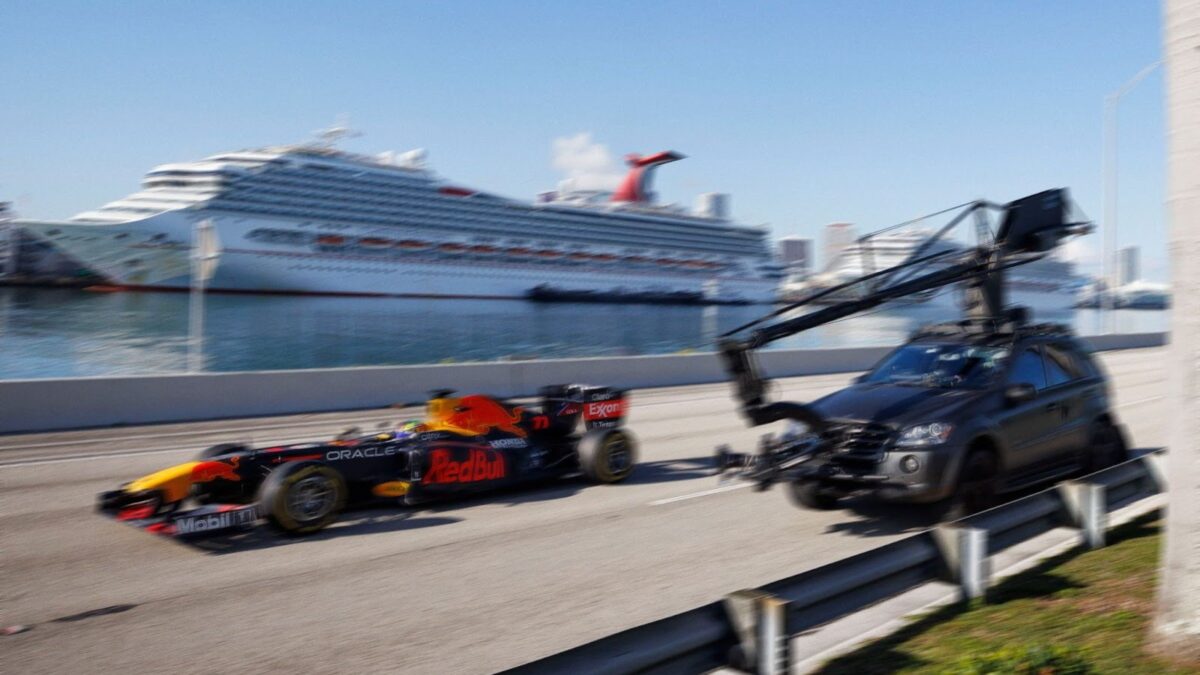
A Fast Camera Car
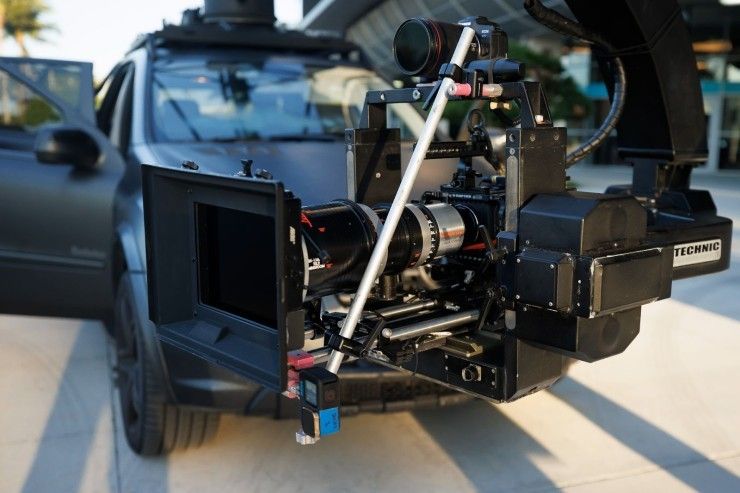
For the bread and butter of shooting, we used a camera car with a flight head V and a MoVI XL. We were committed to using large format cameras on this for the added resolution and added shallow depth of field in the wides, which is a crucial advantage of the larger sensor size of the V-Raptor or Monstro. However, the problem we ran into was the need for a zoom lens on these platforms.
Filmotechnic camera car and flight head outfitted with RED V-Raptor and Masterbuilt 25-125 lens, along with Canon still camera with a fixed 24 for action shooting and analog shaker boxCredit: Chris Tedesco/Red Bull Content Pool
The critical issue was to find glass that wasn’t clinically sharp, but large format zoom lens options aren’t numerous like the S35 ones. In the film world, where every takes counts, you want professional glass that can hold up to the environment. Unfortunately, there are only a few options.
We tried the Fuji Premista and Zeiss Signature zoom options but felt that while beautiful, they lacked some character that we wanted to inject into the picture. Instead, we decided to use Masterbuilt Soft Flare primes for ground shooting and the Masterbuilt 25-125mm zoom for the camera car. The Masterbuilts had more character but would still resolve in 8K, and they would flare without fully punching the sensor. Depending on the shot, we’d usually shoot between an F/4-5.6.
For this project, we shot on a pre-release V-Raptor that RED helped us out with. We shot with it for five days and put it through its paces without issue. Usually, we shot at a 180-degree shutter, occasionally going to 135 when the action was too quick and 180 would just net us a blurry mess of a shot. We’d push the sensor to 1600 ISO for night shooting, and it was squeaky clean.
With the Flight Head V that we used on the track in Miami, we wanted to integrate an analog shaker box to heighten the energy in some shots without using a digital solution. One key piece of our testing was with CMOS wobble or rolling shutter in a moving image.
Previous generation cameras with CMOS sensors would wobble too much in aggressive pans or converge shots, but we found both the V-Raptor and Komodo to be outstanding in this regard. While the Komodo has a global shutter that negates all of these issues, the V-Raptor, while technically a rolling shutter, didn’t exhibit the issues that past cameras had. The issue is that in action shooting when sometimes a shot can be less than a second, the subject moves so quickly that the shutter can “step” or warp, and it lessens the impact of the scene. If you look at the FPV drone with the global shutter on the Komodo, the energy feels substantially more heightened than with rolling camera systems.
Director Nicholas Schrunk with POV rigger Collin Harrington in Little Havana setting up for a final takeCredit: @hobolife
Production Reality
So, you show up the first day with your maps, expecting everything to go to plan, right? Well, it’s never that easy. There are always problems you’ll have to sort out on the fly. Our first shot was next to Wall Street with the driver arriving at the car and a helicopter with a light mounted to the bottom of it illuminating his way because an F1 car doesn’t have headlights. Funny, right?
Funnier still, when the car was en route to location, the transporter caught a nail on the West Street highway. After unloading and completing the warm-up, we were left with only about 20 minutes to shoot before the sun came up.
Jump forward a few hours, and we were scheduled to have only two chances to shoot the car crossing the Manhattan Bridge. Unfortunately, this became just one chance because of the traffic that instantly built up during the road closure.
Finally, we ended the day doing a pit stop on historic 5th Avenue next to Billionaires’ Row. Midway into shooting our pit stop, a protest marching up the street shut us down. All of this was just on our first day!
Long story short, we had to be flexible and make sure we got the shots because who knew what was coming next.
Our team responded well to all of the production challenges thrown at us, but we still needed to be flexible in post to make sure we accomplished everything we set out to do.
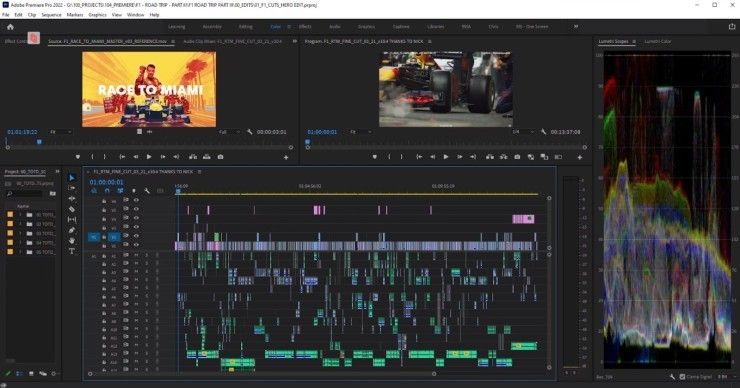
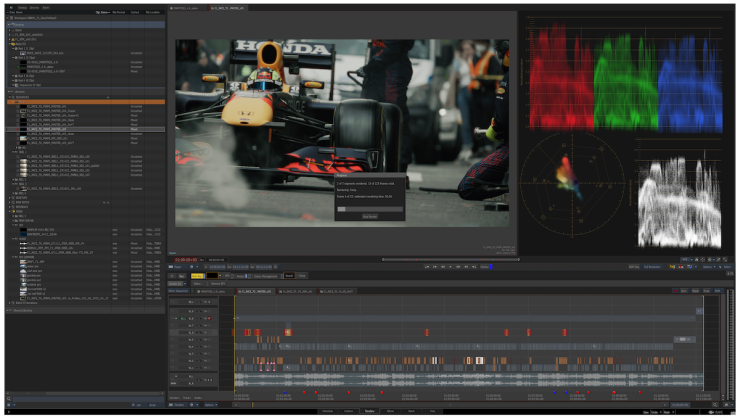
Final Premiere Pro timeline pre-conformCredit: @99jackals
Post-Production
Getting into post, there are so many elements that make a project successful. You have the music, sound design, editing, VFX work, and graphics. For us, we really wanted everything in our story to feed into the idea of what it’s like to actually be there with a Formula 1 car, so, in order to stay authentic, there are no CGI cars in this film. It’s all real environments with real stunts and driving, and everything pushes towards capturing that real-world experience.
Workflow-wise, we edited everything in Premiere Pro with a lead editor and two assistants pulling selects/organizing footage and syncing audio. We did an offline/online workflow where we had an Autodesk Flame artist who would take the final cut and conform everything using the original raw camera files, before going to DaVinci Resolve for color and then back to Flame for output.
Since we shot multiple formats, we used Flame’s color-managed workflow to maintain each file’s specific color science until it went to Resolve, so we could non-destructively work on all the shots with both VFX touch-up work and other elements to enhance the picture. I’ll let our VFX artist Jeremy Hunt describe the rest:
“The key to keeping everything looking its best was maintaining the 16-bit color out of the RED cameras. To that end, we did all of the work at 16-bit float. Since we try to squeeze everything out of the 8-bit sources, any work done to them also happens in a 16-bit floating point workflow to ensure that all of the data we have can get pushed through to color. Ultimately Flame is caching and rendering to uncompressed EXR or DPX and uses EXR 16-bit floating point for delivery to and from color. For RED sources, we used the IPP2 color science log3G10 to preserve every bit of range needed for an HDR grade.”
We used so many different camera formats in production to open up flexibility and preserve resources for post. This workflow helped us find a way to match everything together, so that it didn’t look disjointed.
Race to Miami Autodesk Flame workspace. Credit: @sdmfx
One of the VFX tricks we used was to de-grain any shot with noise, and then re-grain the entire film after it was color corrected. In some instances, where the shutter wasn’t a perfect 180-degree (mostly POV shots), we would add motion blur in post to these shots. The downsampled V-Raptor 8K footage to UHD looked incredible, and, if we needed to re-compose some shots, they would work well and not lose any apparent resolution.
We had to do quite a bit of specific work so the film grain would come through, even though a compressed YouTube deliverable would be the main export the grain would aggravate the compression codec, so a balance of it was decided and tested before we committed. Even on iPhone or Android viewing the compression looks good, a tough feat for so many layers of finishing.
Putting It All Together
While tech and gear are a driving force for getting your story on screen, they are ultimately just something you put on top of your main creative story. We had a great concept, great performances by our driver Sergio and our team principal Christian, and a solid plan of ideas from the team. The execution and equipment are really just amplifying what our team put together. In the end, I’m thankful for the opportunity to tell such a fun story, and I hope you enjoyed learning a bit more.